by IGC Admin
Share
by IGC Admin
Share

All jokes aside, here’s how to care for your compost worms.
The worms you may have purchased in the plastic container at your local Independent Garden Centre are not likely to be ordinary “earthworms” but a very close relative, especially bred for composting.
They are a mixture of tiger worms (Eisenia Fetida), and red worms (Lumbricus Rubellis). These worms differ from ordinary garden earthworms in that they are better at eating and breeding, whereas common garden worms are great burrowers. Your compost worms are the Porsches or Ferraris of the worm world!
The important part that these worms play in our lives today is the way they can break down nearly any organic waste matter into “worm castings”, thus turning waste products into a valuable and truly organic fertilizer.
The addition of these worms to your compost bin or heap will greatly accelerate decomposition and breakdown. So, if you are starting a new compost bin or heap, make sure you have some food in there before placing the worms in.
Care and Maintenance:
All organic wastes are suitable excluding onions, citrus, and meat or fat. Another important point to remember is that worms absorb moisture from what they eat, so the compost must be kept moist at all times. Worms don’t have teeth, so they actually drink what they eat.
The simple addition of water once or twice a week is normally sufficient, but remember the compost should be moist, not wet or saturated, as this slows the whole process in creating an anaerobic (without air) condition.
Aside from your food scraps (kitchen waste), some horse, cow, rabbit, sheep, guinea pig, alpaca, dog, or cat manure can be added to the compost if it is moistened either before or after you put it in (chicken manure should be avoided due to its acidity). Grass clippings, leaves, soaked newspaper and cardboard, are also beneficial to the health of worms.
Remember that the smaller you can cut up your vegetable matter the quicker it will break down because the worms will be able to consume it more easily. If possible, place your bin in a cool shady place because worms like to stay cool.
About once every two weeks you should give your bin a turn over with a garden fork to help with aeration. When doing this, check that moisture levels are consistent through the bin and if necessary, add water.
If your bin or worm farm starts to smell, it could be becoming slightly acidic, so you can always add a couple of tablespoons of garden lime to sweeten it up a bit, and raise your pH slightly.
Worms need a variation in their diet so lots of different things keep them healthy. Include a supplementary diet of an occasional dressing of fresh manure will provide a balance to that diet.
Harvesting Worms:
One method used to remove the worms (so that they can be used in the garden) is to attract them as close to the surface of the compost or worm farm as possible, and then remove them with as little compost or castings as you can. The easiest way to do this is to let them go hungry for a couple of weeks, then put in some moistened cow or horse manure, and a couple of days later dig out the top layer with most of your worms in it.
When you harvest your worm colony from your compost bin, simply add castings with worm eggs and some worms to garden beds but retain some “workers” for your next colony in the compost bin.
Worm castings will help break up clay soils, help to bind sandy soil, and the worm eggs in the castings will hatch, producing more young worms to aerate your gardens.
Worm Casting Analysis:
Nitrogen 14.4 % Calcium 1.58 % Phosphorous 0.89 % Potassium 0.34% Magnesium 0.34%
Charles Darwin said in his thesis on the worm: “They are the intestines of the Earth” and he was totally fascinated by these lowly creatures, saying they were the most important of all for our health and well-being.
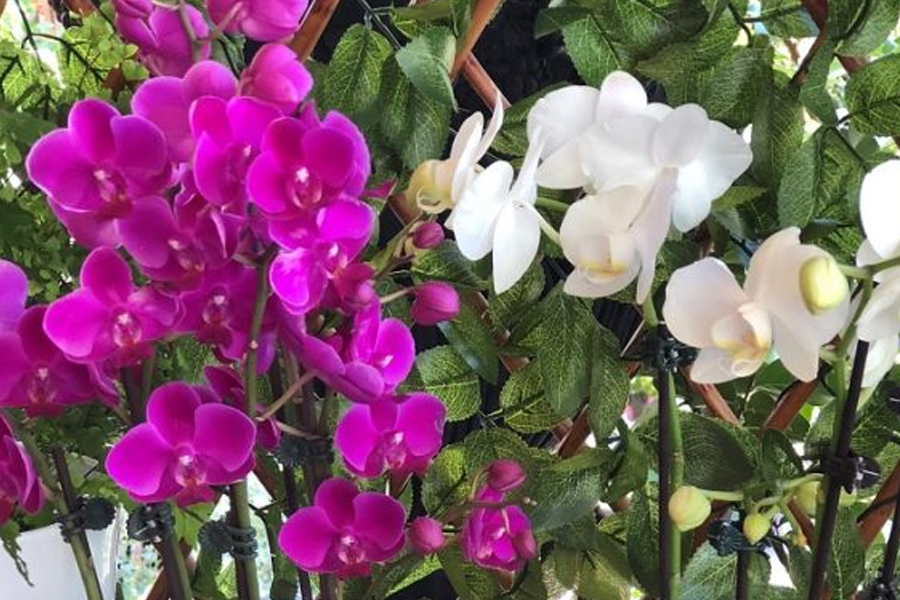
A Living Gift provides many weeks or months of flowering beauty and is fantastic value for money.
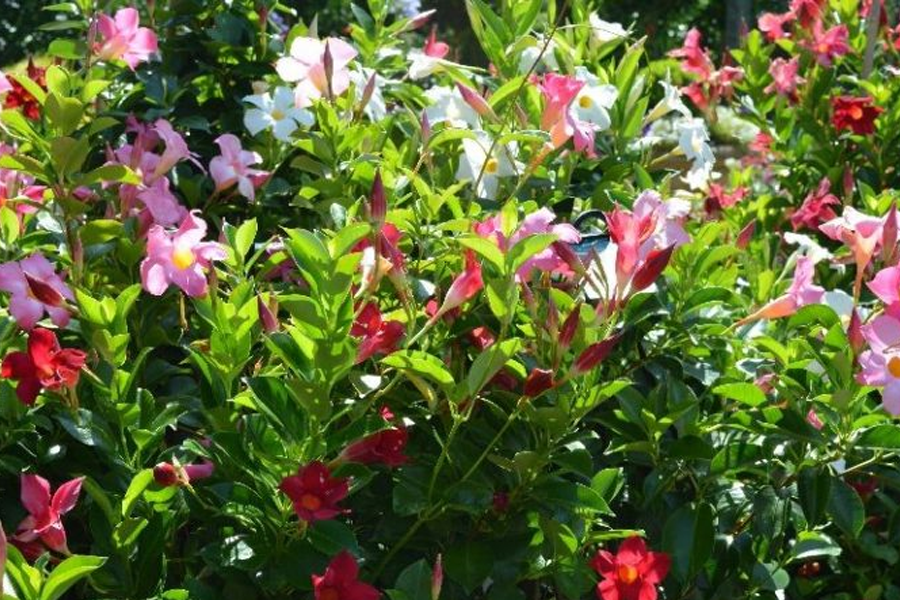
Stunning tropical –look summer showstoppers providing an irresistible show of colour to brighten up your home.
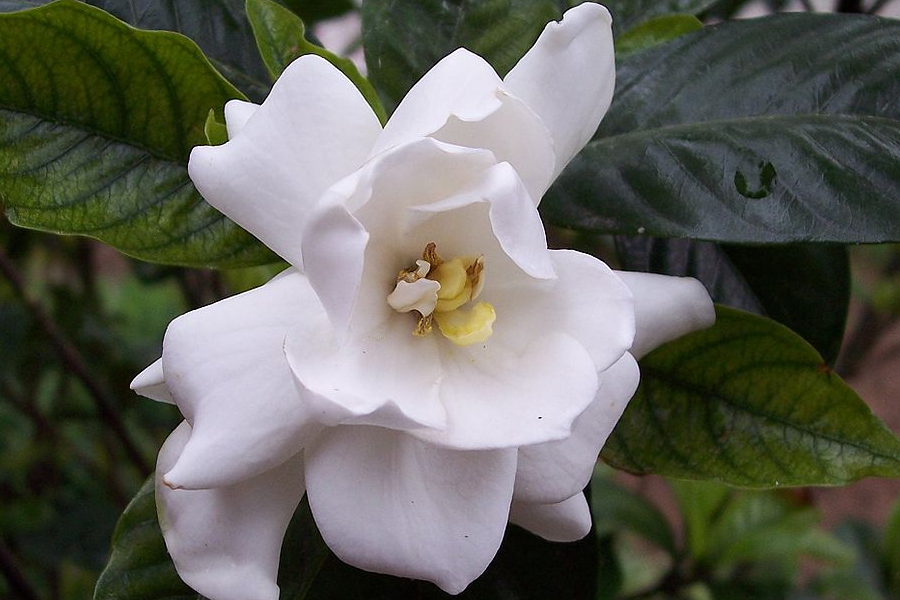
Gardenia are very popular and a much-loved shrub, which originated from China, but it's important to know how best to care for them.

The Rose has been called the “Queen of Flowers” and has been written about in poetry, songs, and love letters, more so than any other garden plant.